
MATERIALS NEEDED
Dental Stone* (Labstone Type III, etc).
Plastic ring to use as a retainer.
Plastic Ziploc bags (quart) to store
the dry powder and to mix the material in.
Plastic cup to measure the power and water.
Set of tweezers.
Water.
Plastic ring to use as a retainer.
Plastic Ziploc bags (quart) to store
the dry powder and to mix the material in.
Plastic cup to measure the power and water.
Set of tweezers.
Water.
 |
Here are the simple directions needed to successfully cast tracks in the field with little cost and virtually no mess to clean up.
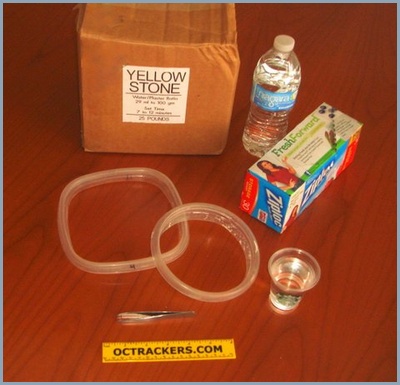
We strongly recommend using a product such as dental stone* rather than plaster of Paris or other patching compounds as it dries quickly and has superior strength. It can be purchased on-line from any dental supply house, and a 20 pound box that should last you for years will cost about $40.00. Mixing directions should be on the box and those ratios should be closely followed but experimentation, depending on weather, is prudent. Most of the time the ratio will be about 2 parts powder to one of water. (DC Dental Supply suggests 100g powder to 30 cc water). I prefer to use their yellow colored powder as the casts appear more natural, but you can also get it in white. I have tried increasing the amount of water slightly during extremely hot weather conditions to extend my mixing and drying time. Be sure to store your box of unused dental stone in a dry place.
For casting animal tracks I use a small 4 ounce plastic cup that I get from Starbucks as a measuring device. This is the cup they use for giving away samples. I use a one quart size plastic Ziploc bag to mix the materials in and for a collar or retainer to surround the track, I use a 2" tall plastic ring that I make by cutting away the upper portion from any plastic container I find around the kitchen. Any one pound (16 oz.) circular container that measures 4" or 5" in width will do for all but the largest tracks. For cougars and other large animals, I like to use a 6" X 6" rectangular collar. Many of the plastic storage containers sold in grocery stores will also work well. They are very inexpensive and can be reused time and time again as any dried material will fall off when you gently press the cast out of the collar later in the day. For casting of human footprints or tire impressions you will have to improvise in making a collar. I like to leave my casts in the plastic collar for several hours or until I get back home before gently pressing them out with my fingers. To clean the dried cast, I put it under the garden faucet briefly and rub it gently with my fingers to remove most of the soil. I do like to leave a tiny amount of the substrate on the cast as I think it looks good, and I never paint my casts. Any sharp edges along the sides of the cast can be filed off the next day using a file or by rubbing the cast against some rough concrete or a concrete block. Moisture will continue to exude from the casts for several days or more so be careful where you set them and do not store them in a plastic bag for a month or longer.
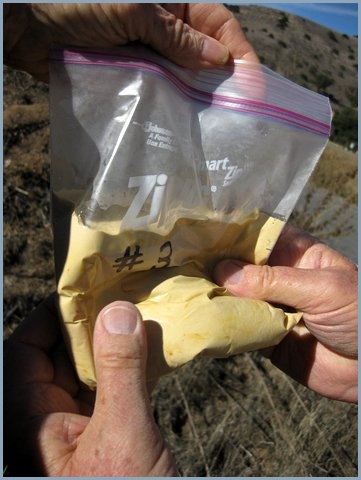
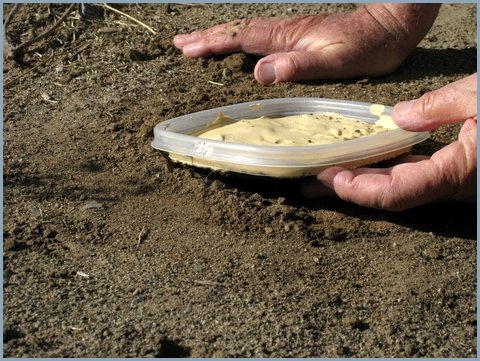
For your first attempt, put 3 parts of dental stone (3 full plastic cups) into a one quart plastic Ziploc bag and mark the outside of the bag with a large #3 to remind you of the content. This amount should fill a 5" collar. When you are in the field use your measuring cup to add one and a half cups of water to the three cups of pre-measured powder in the bag. Then tightly seal the bag and quickly begin to massage the bag from the bottom so as to get a thorough mixture while not leaving any lumps of dry power or air bubbles trapped within the material. Do not invert or shake the bag and having someone else to hold the bag upright while you mix it with both hands will help. I find that it takes about 45 seconds to mix properly.
The mixture will start to thicken up as soon as you add water into the bag so you will need to work quickly to thoroughly mix it before it gets too thick. You want it to be about the consistency of thin pancake batter when you begin to pour so it will flow down into the small cracks and grooves of the track. This will give you good detail within the cast. Hot weather will cause the mixture to thicken faster and you may have to either cut the mixing time down slightly or start with a little extra water but do not attempt to add more water once the mixture begins to thicken. If it is too thick, it is better to discard this batch and prepare a thinner one so as to not ruin the track.
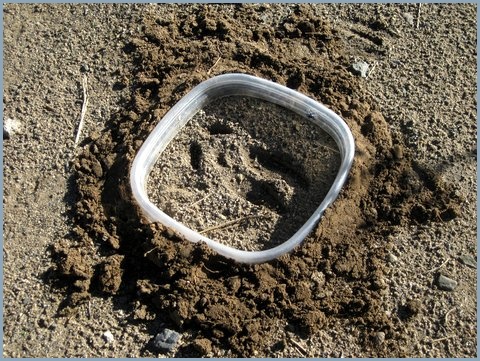
Position your plastic retainer ring over the track and press it down slightly into the level substrate so the material will not run out from under the sides. If the terrain is sloped at all you may need a deeper retainer ring and more mix to fill the form deep enough for it to have sufficient strength.
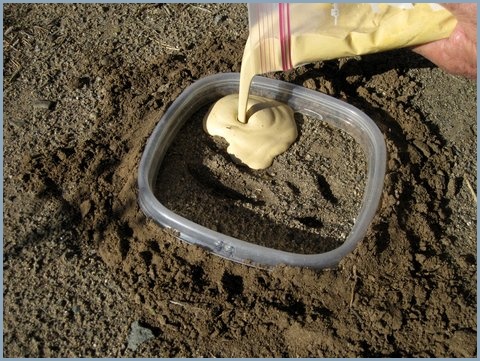
Pour your mixture directly from the bag into the retainer trying not to pour directly on top of the track as that might distort it. Mixed properly, the dental stone should flow freely into the track and fill the ring to a depth of about 1/2" or more. Making the cast too thin will potentially leave you with a broken worthless cast. If your mixture was too runny, adjust the amount of compound/water you put into the bag next time remembering to add a proportionate amount of water so as to maintain the 2 to 1 ratio. Once you figure out the amount of powder needed to fill each of these rings, you can go ahead and fill up several other bags but mark each of them as to the amount of powder contained and the amount of water to be added. Keeping a log of your mixture ratios and results will ultimately enhance your efforts.
In the field I measure and photograph the track before beginning the cast, just in case. Then I pour my casts and walk away to look at other tracks allowing at least 15 minutes before returning to pick up the plastic mixing bag, clean up any mess and recover my new cast.
I lift the cast and collar from the substrate by sliding my fingers under one edge while carefully lifting it up so as to not put undue pressure on other side of the cast. If the casting material is still soft on the top or it sounds hollow when you tap on it, it is definitely too soon to be picked up and you should leave it alone to dry properly. The used Ziploc bag can be thrown away later and the measuring cup and collar can be reused. Since you mixed the compound in the bag, there should be no sticks, cups or anything else that needs to be cleaned up.
Besides a couple of plastic rings and the small mixing cup, I carry several Ziploc bags prefilled with the appropriate amount of dental stone for both the 5" and 6" containers in my backpack. After finding a good deep track in the field, I often will clean up the track by carefully removing any leaves or other debris with a set of tweezers. Then just add the correct amount of water to the bag, mix it thoroughly and complete the pour remembering that anything you can see in the track will show up in your cast.
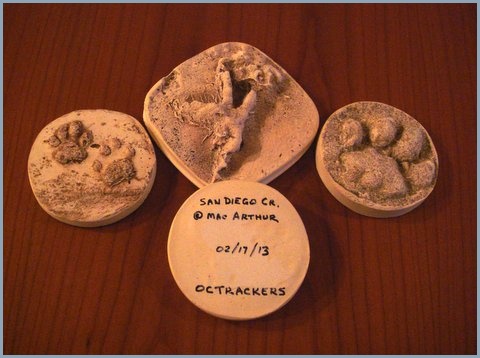
We label the back of each cast with location, date and other pertinent information. Practice will result in better casts and you want to get your practice in before you find that perfect track.
Click HERE for a printable version of this page.